Category Archives: seafood

A very easy garlic prawn entree

easy garlic prawn entree

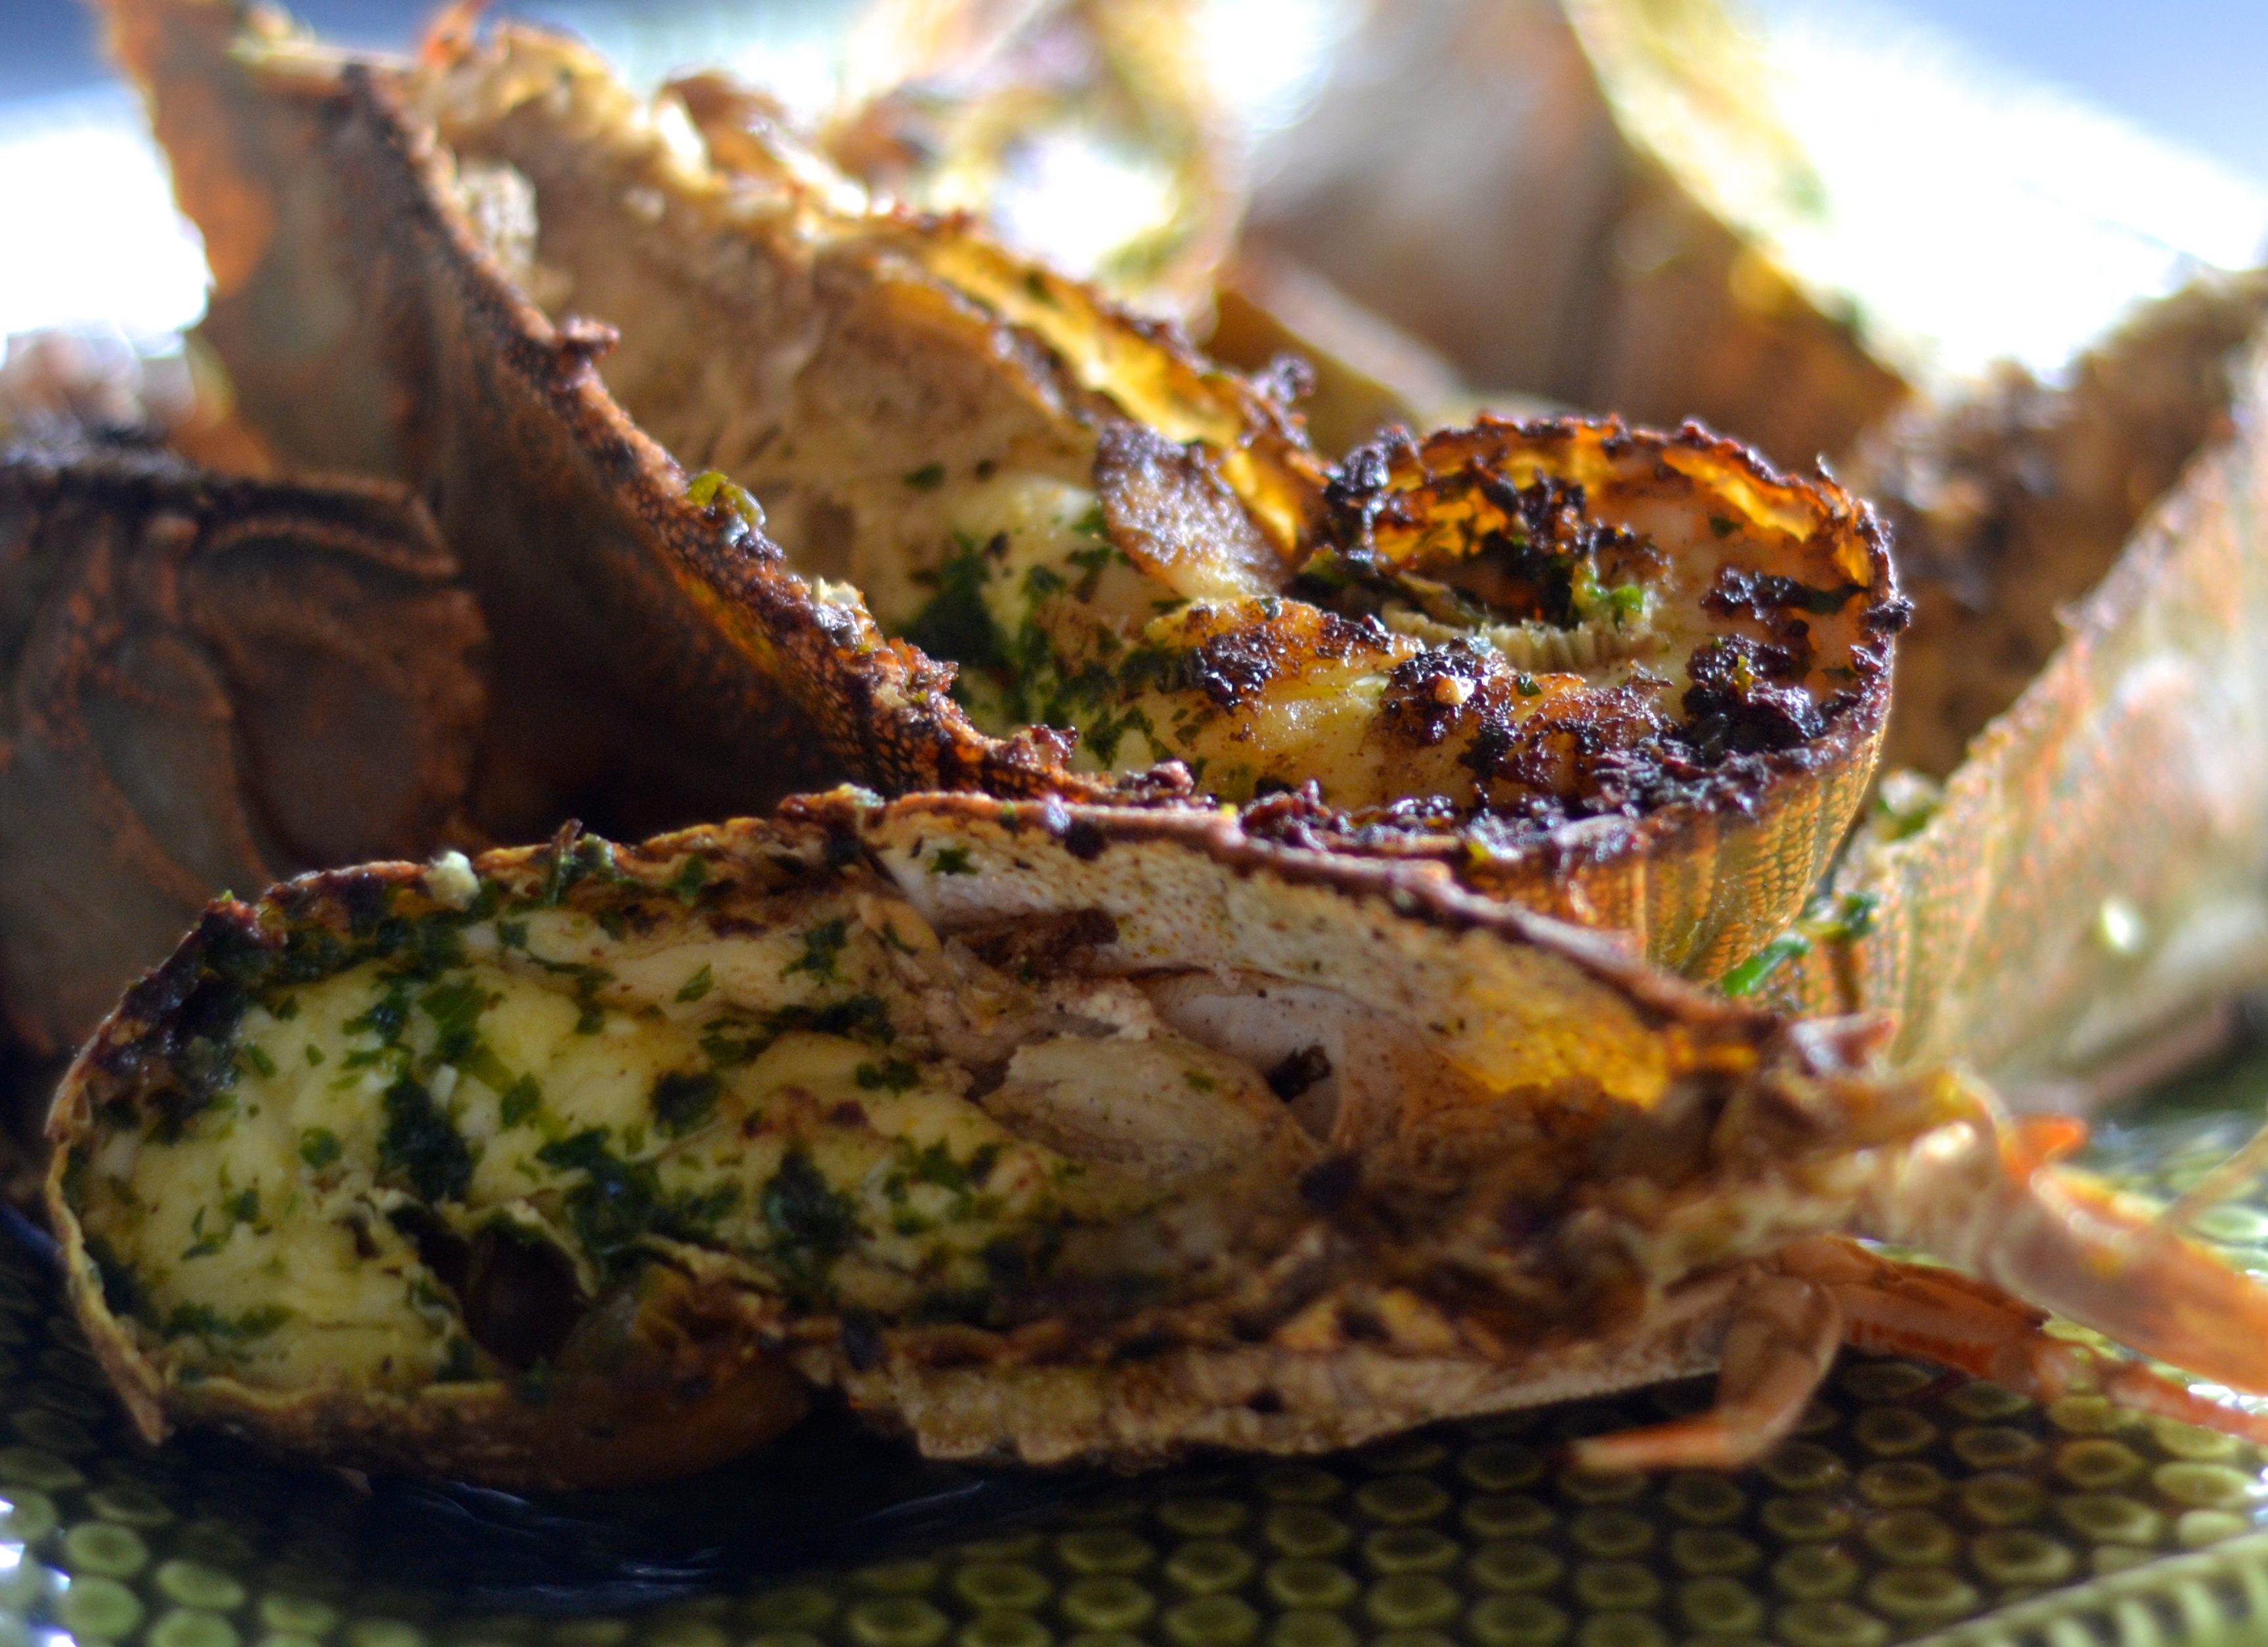
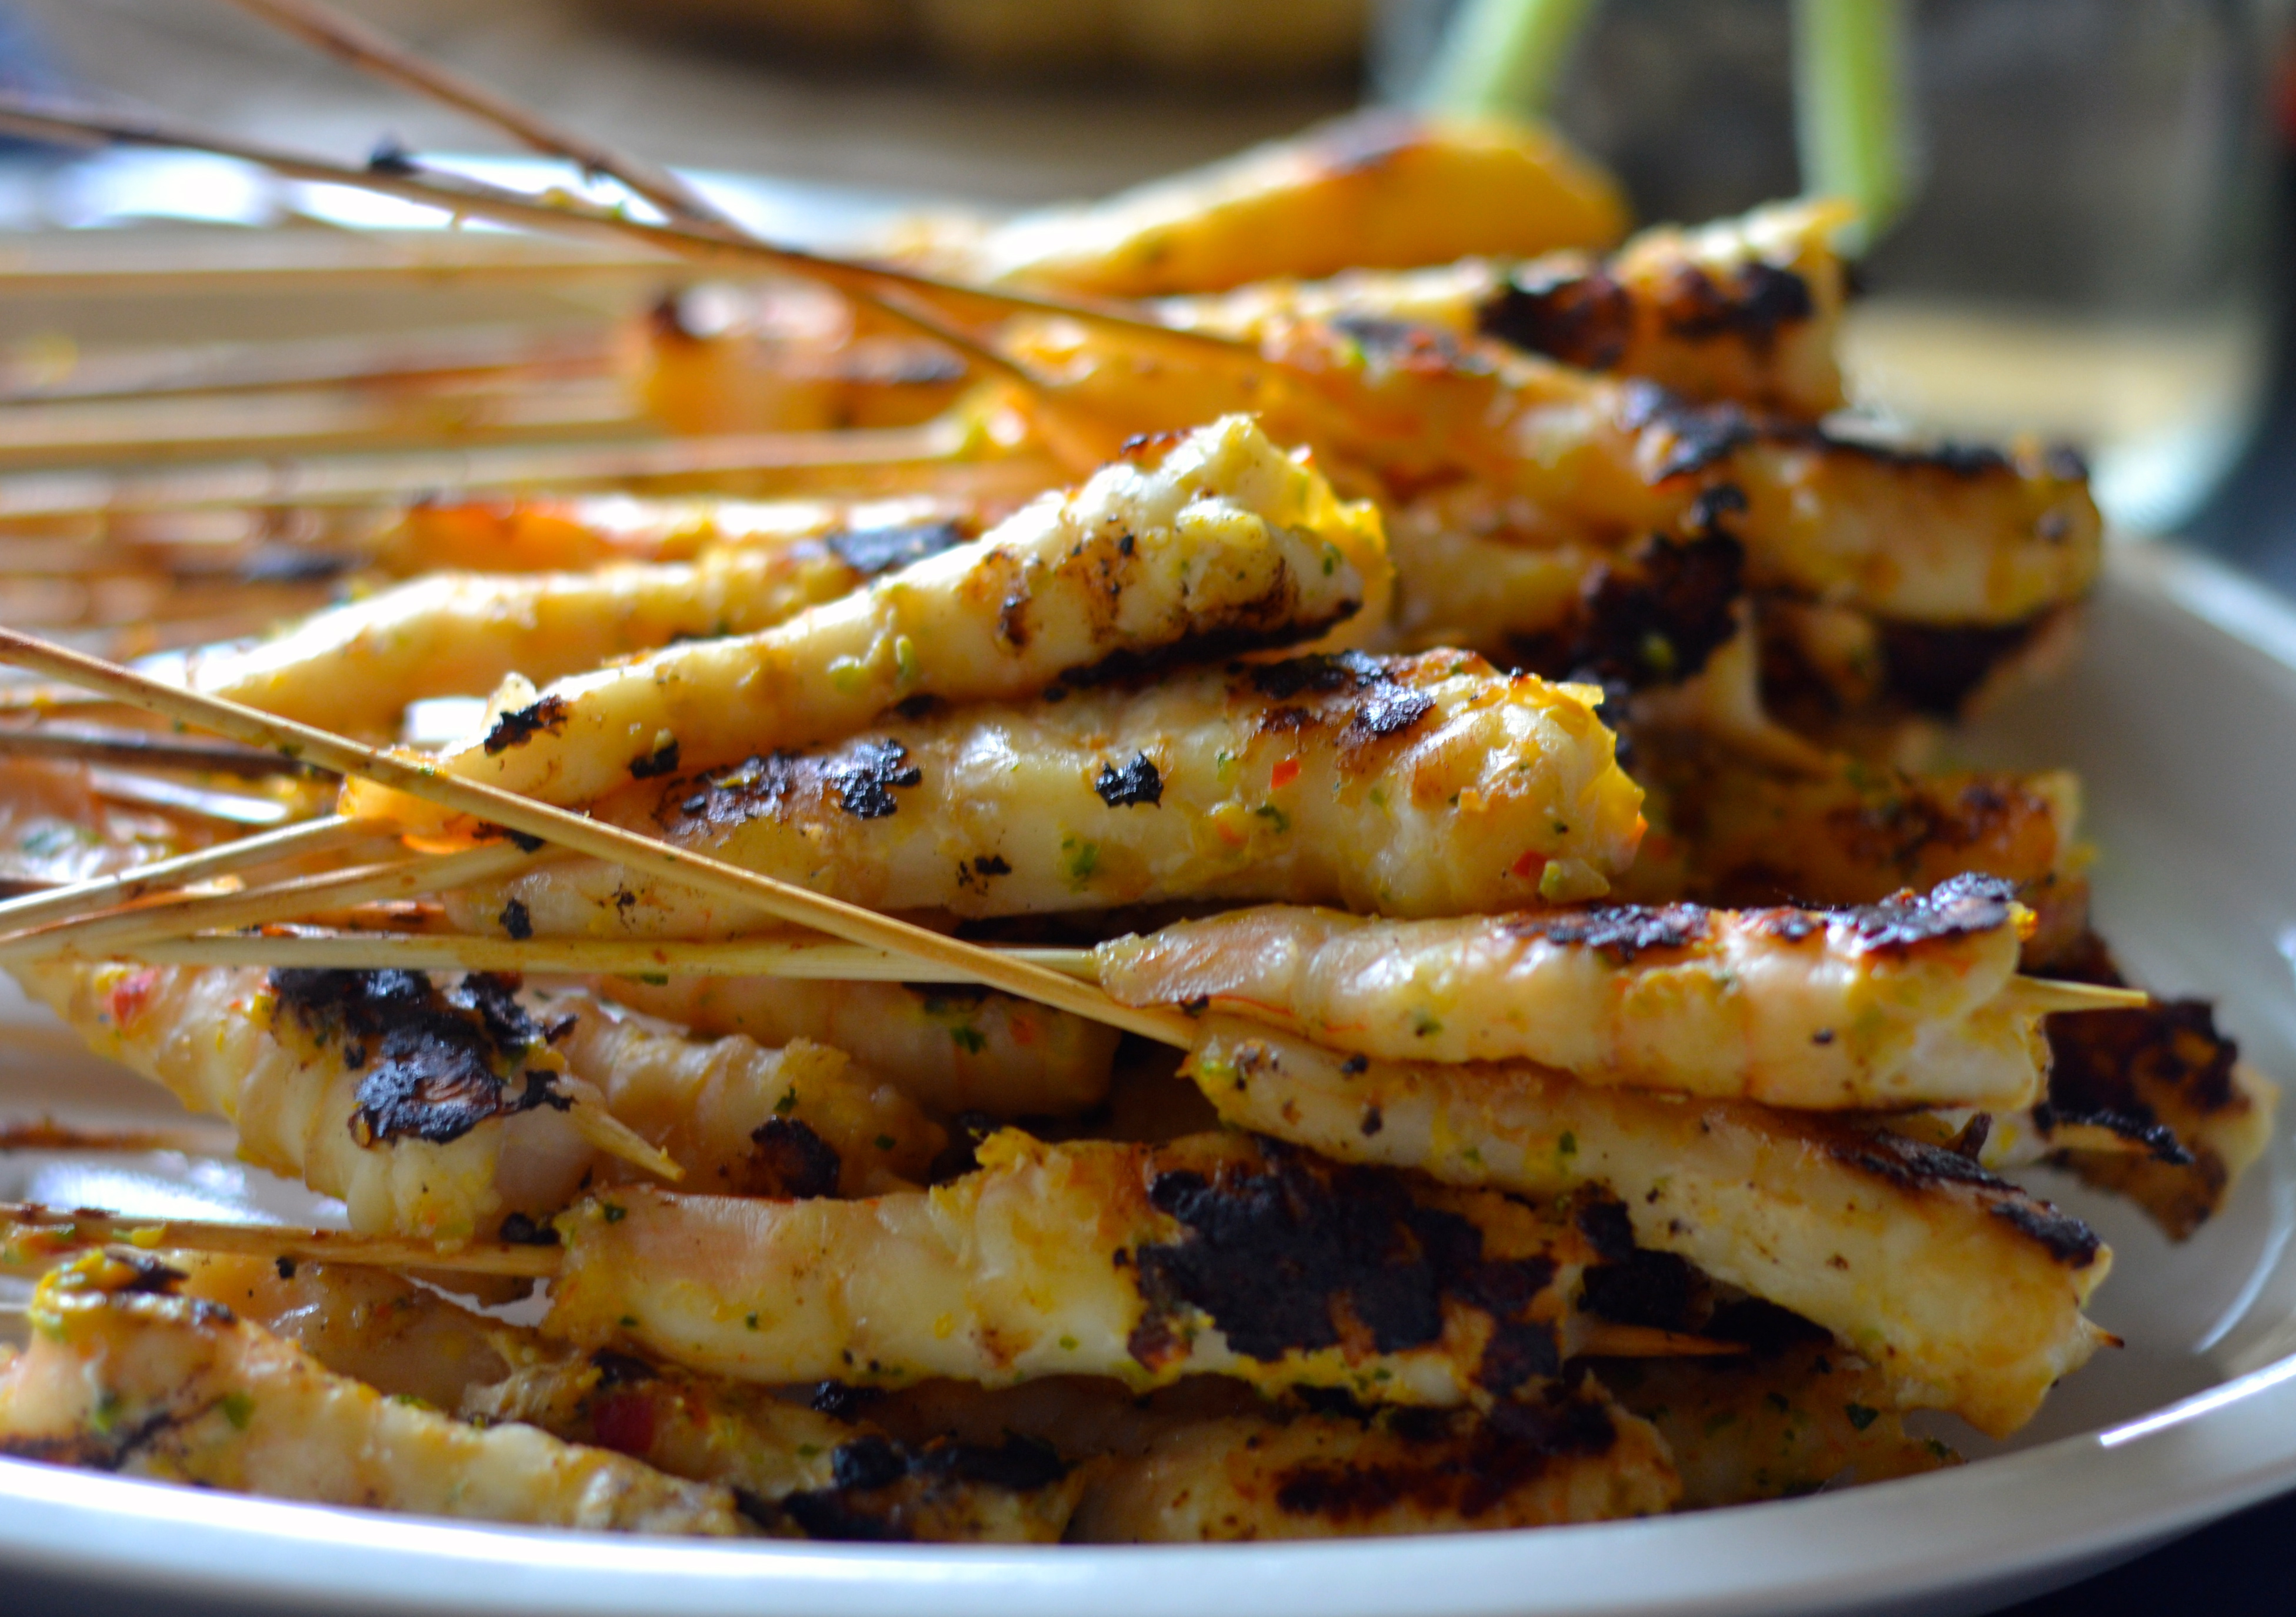
Prawns plus garlic. The perfect combination. Add some fresh bread and you have a very easy garlic prawn entrée. The best thing about this starter is that it’s served ‘en papillote‘ or in the bag, which means that there’s a little bit of theatre when you bring the garlicky crustaceans to the table. Guests have to tear open their own individual parcels, releasing the wonderful cooking aromas, at the same time as revealing the pink, parsley flecked prawns inside.

easy garlic prawn entree

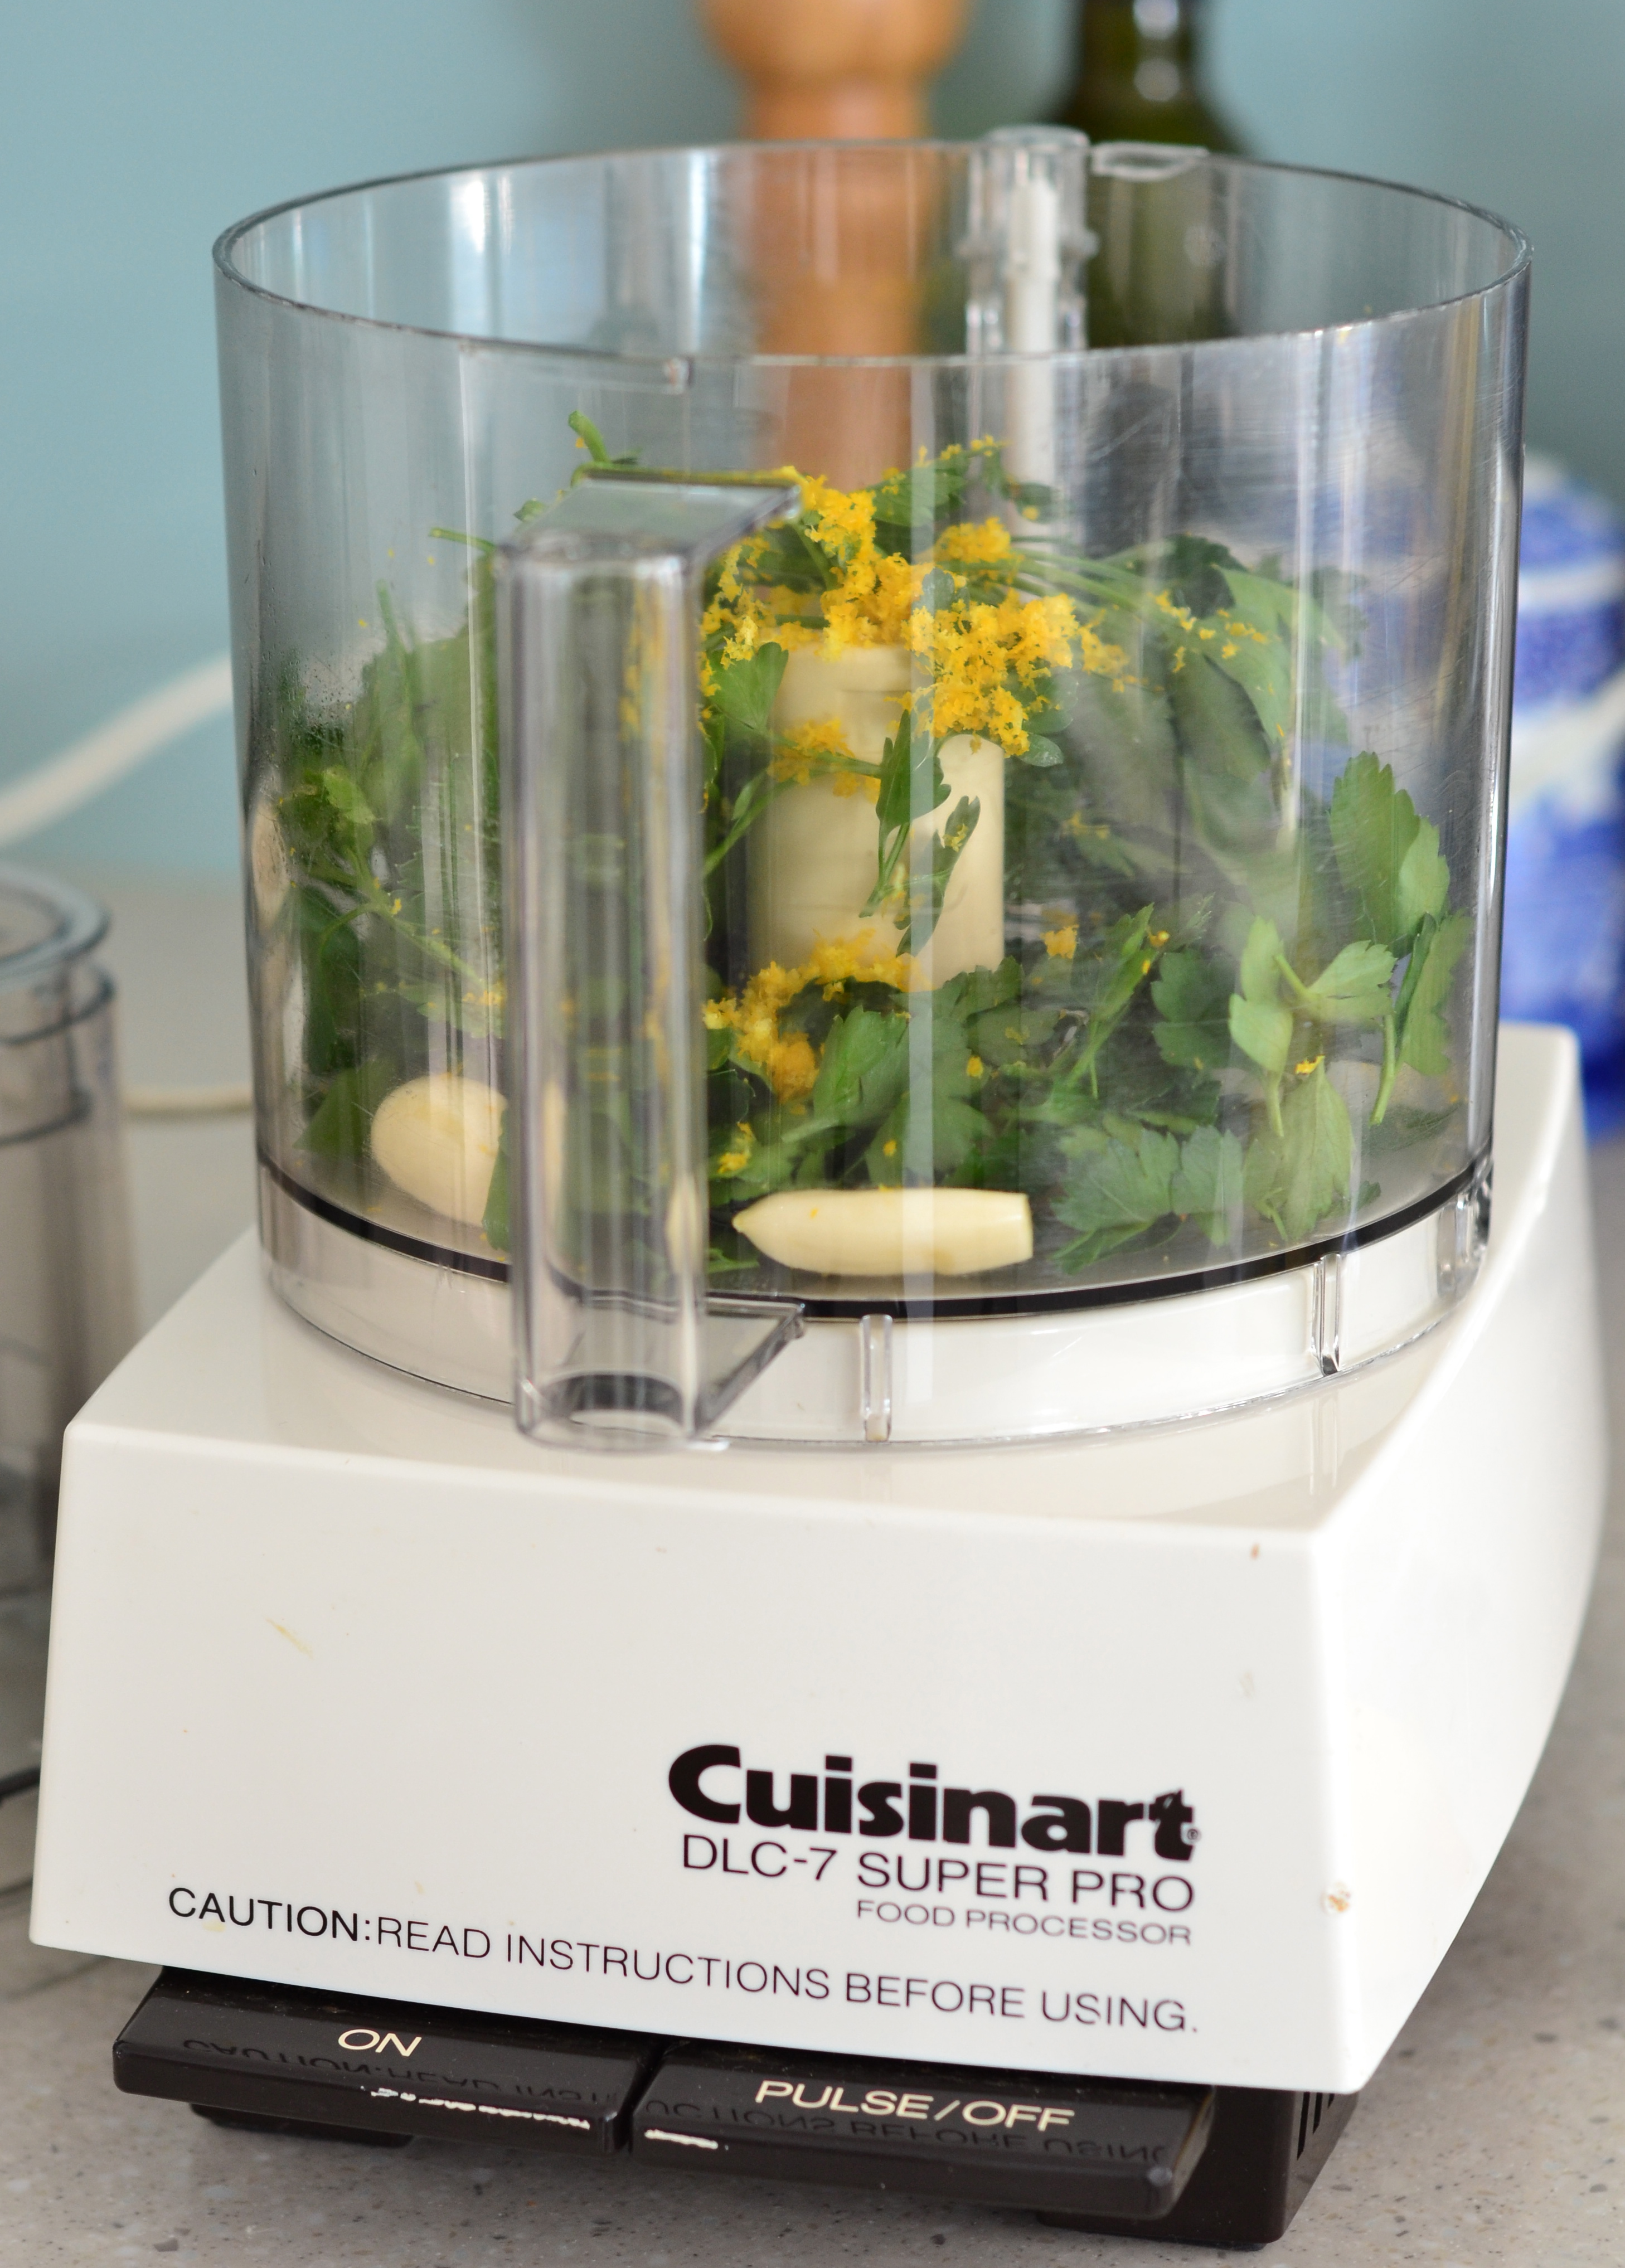
Home made garlic butter is the best. A few cloves of garlic, a handful of fresh herbs, a grating of lemon zest and some soft butter, press the button and it’s done. Use it to smother over thickly sliced bread before toasting under the grill to make garlic bread. Stuff chicken breasts with it for delicious homemade chicken Kiev. Fry some sliced mushrooms in it and serve them on triangles of brioche. But make lots and freeze it so that you always have some on hand.

easy garlic prawn entree

easy garlic prawn entreeeasy garlic prawn entree

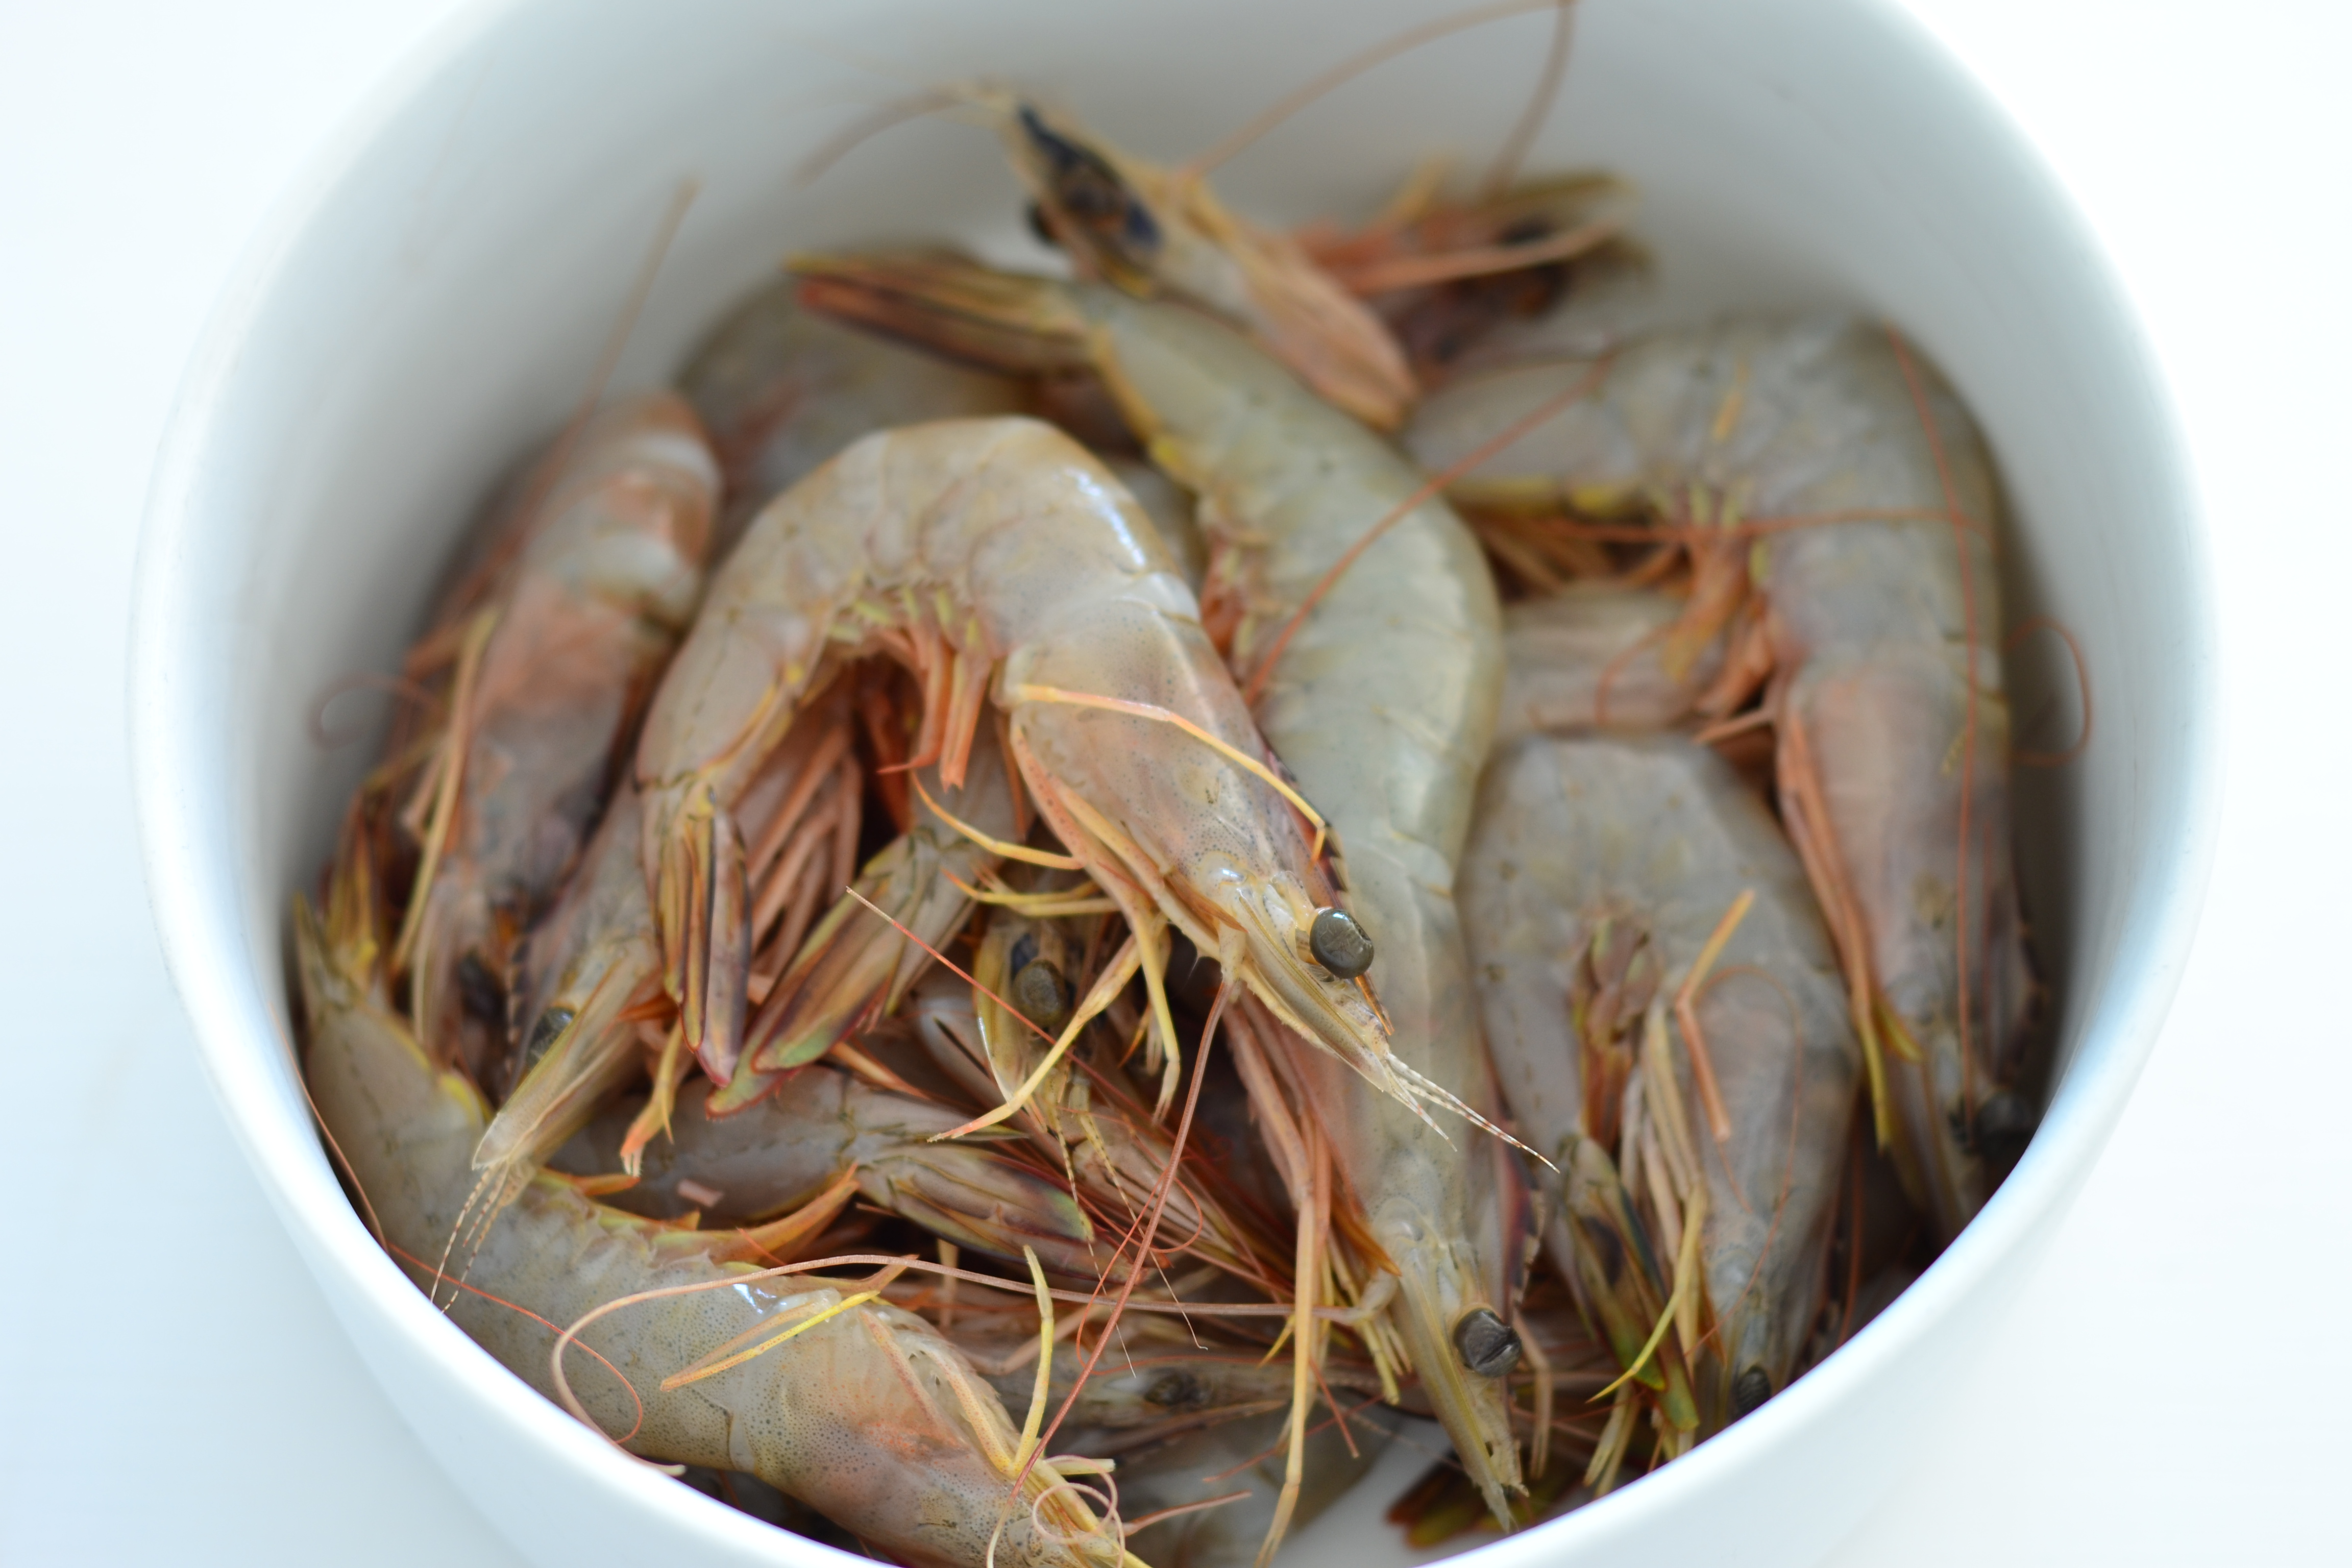
I think that a hankering for prawns is a sign that the weather is getting warmer. The days longer.  The sun lingering in the sky. Prawns are the kind of food that I like to take time to eat, whether around a table with friends or simply with a significant other and a bottle of wine. Leisurely peeling away the crisp shells and dipping the pink meat into piquant seafood sauce, in an al fresco setting. When buying prawns, look for ones with smooth black eyes, not ones with eyes that look like currants. This is a sign that they are fresh, or so I was told by a lady who sold me some of the sweetest, freshest prawns that I’ve ever eaten.

easy garlic prawn entree

A very easy garlic prawn entrée

For 6.

  • 1-1.5kg prawns (which should be around 30-45 prawns depending on their size and how many you want to serve to each of your guests)
  • 4 cloves garlic
  • 250g soft butter
  • 1 bunch parsley, leaves only
  • zest of 1 lemon
  • pinch of salt
  • glass of white wine

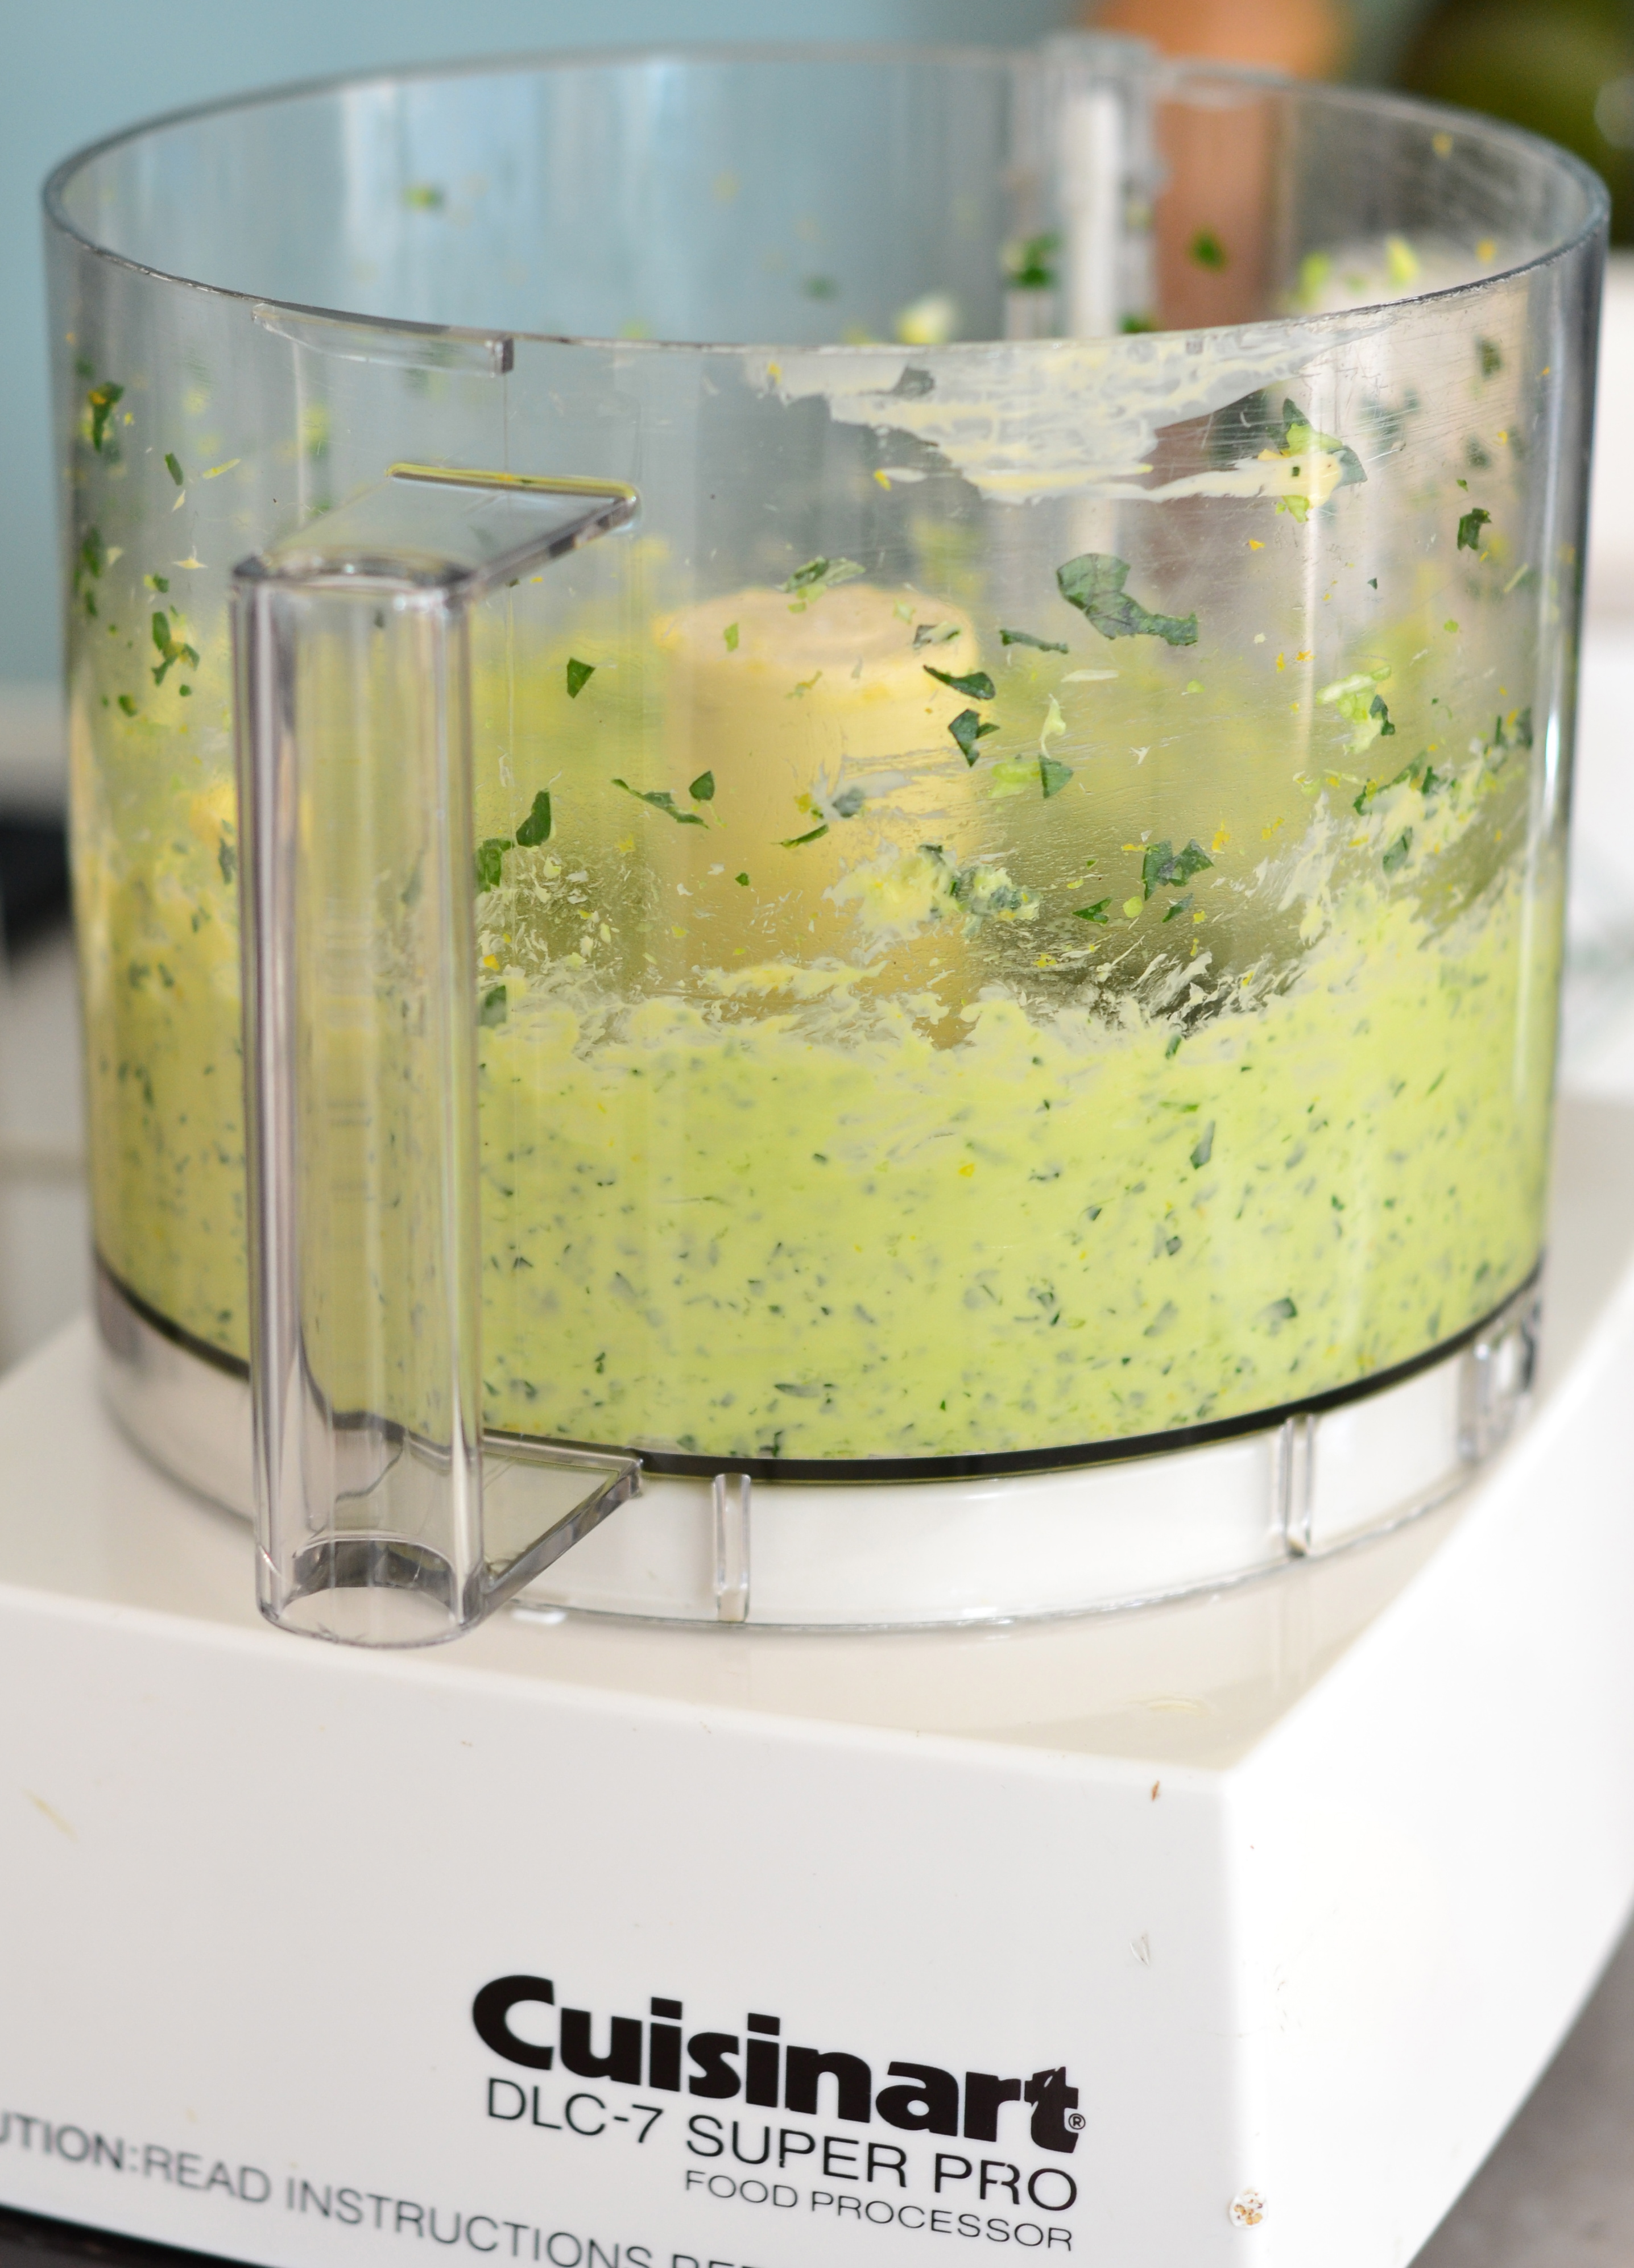
Begin by making the garlic butter. Simply put the garlic, butter, parsley, zest and salt in a processor and whizz until everything is well combined.

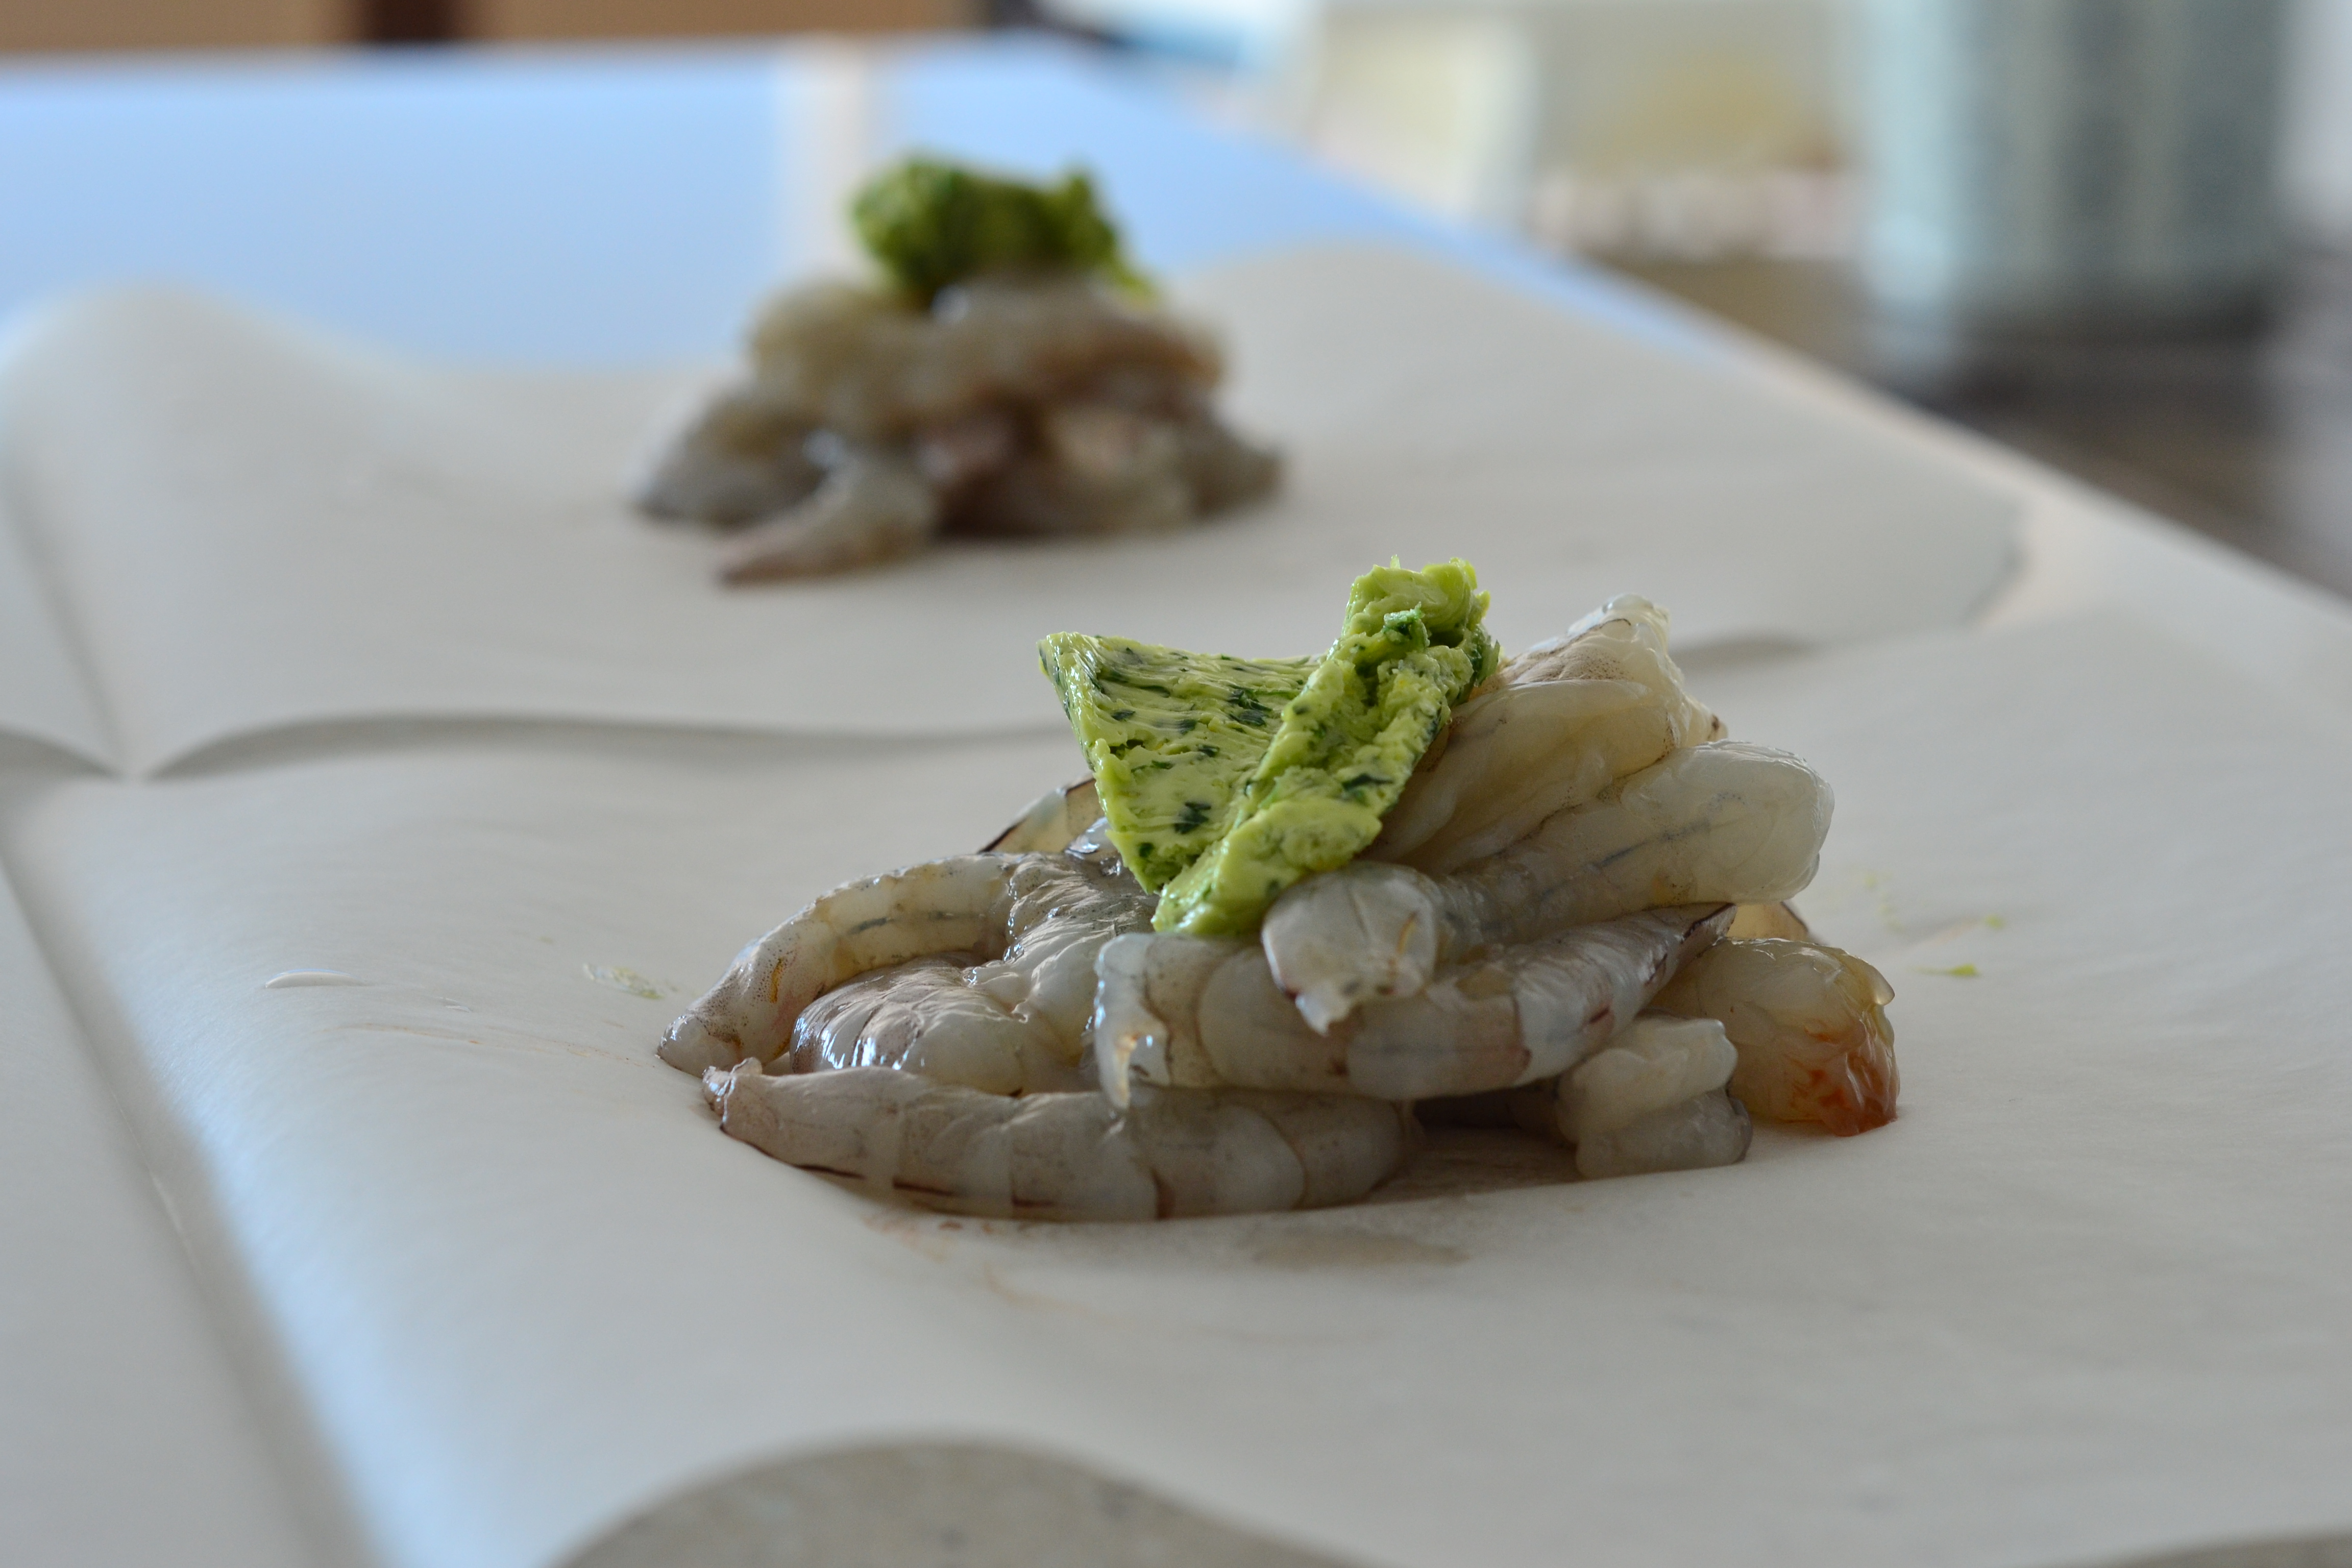
Prepare the prawns by removing their heads and shells (you can keep these to make prawn stock) and then the vein that runs down their backs.

Tear off six pieces of baking paper about 40cm in length. Fold these pieces in half, just so you have an indication of where to put the prawns. Place 5-7 prawns per person on one half of each piece of baking paper and top with a generous amount of butter.

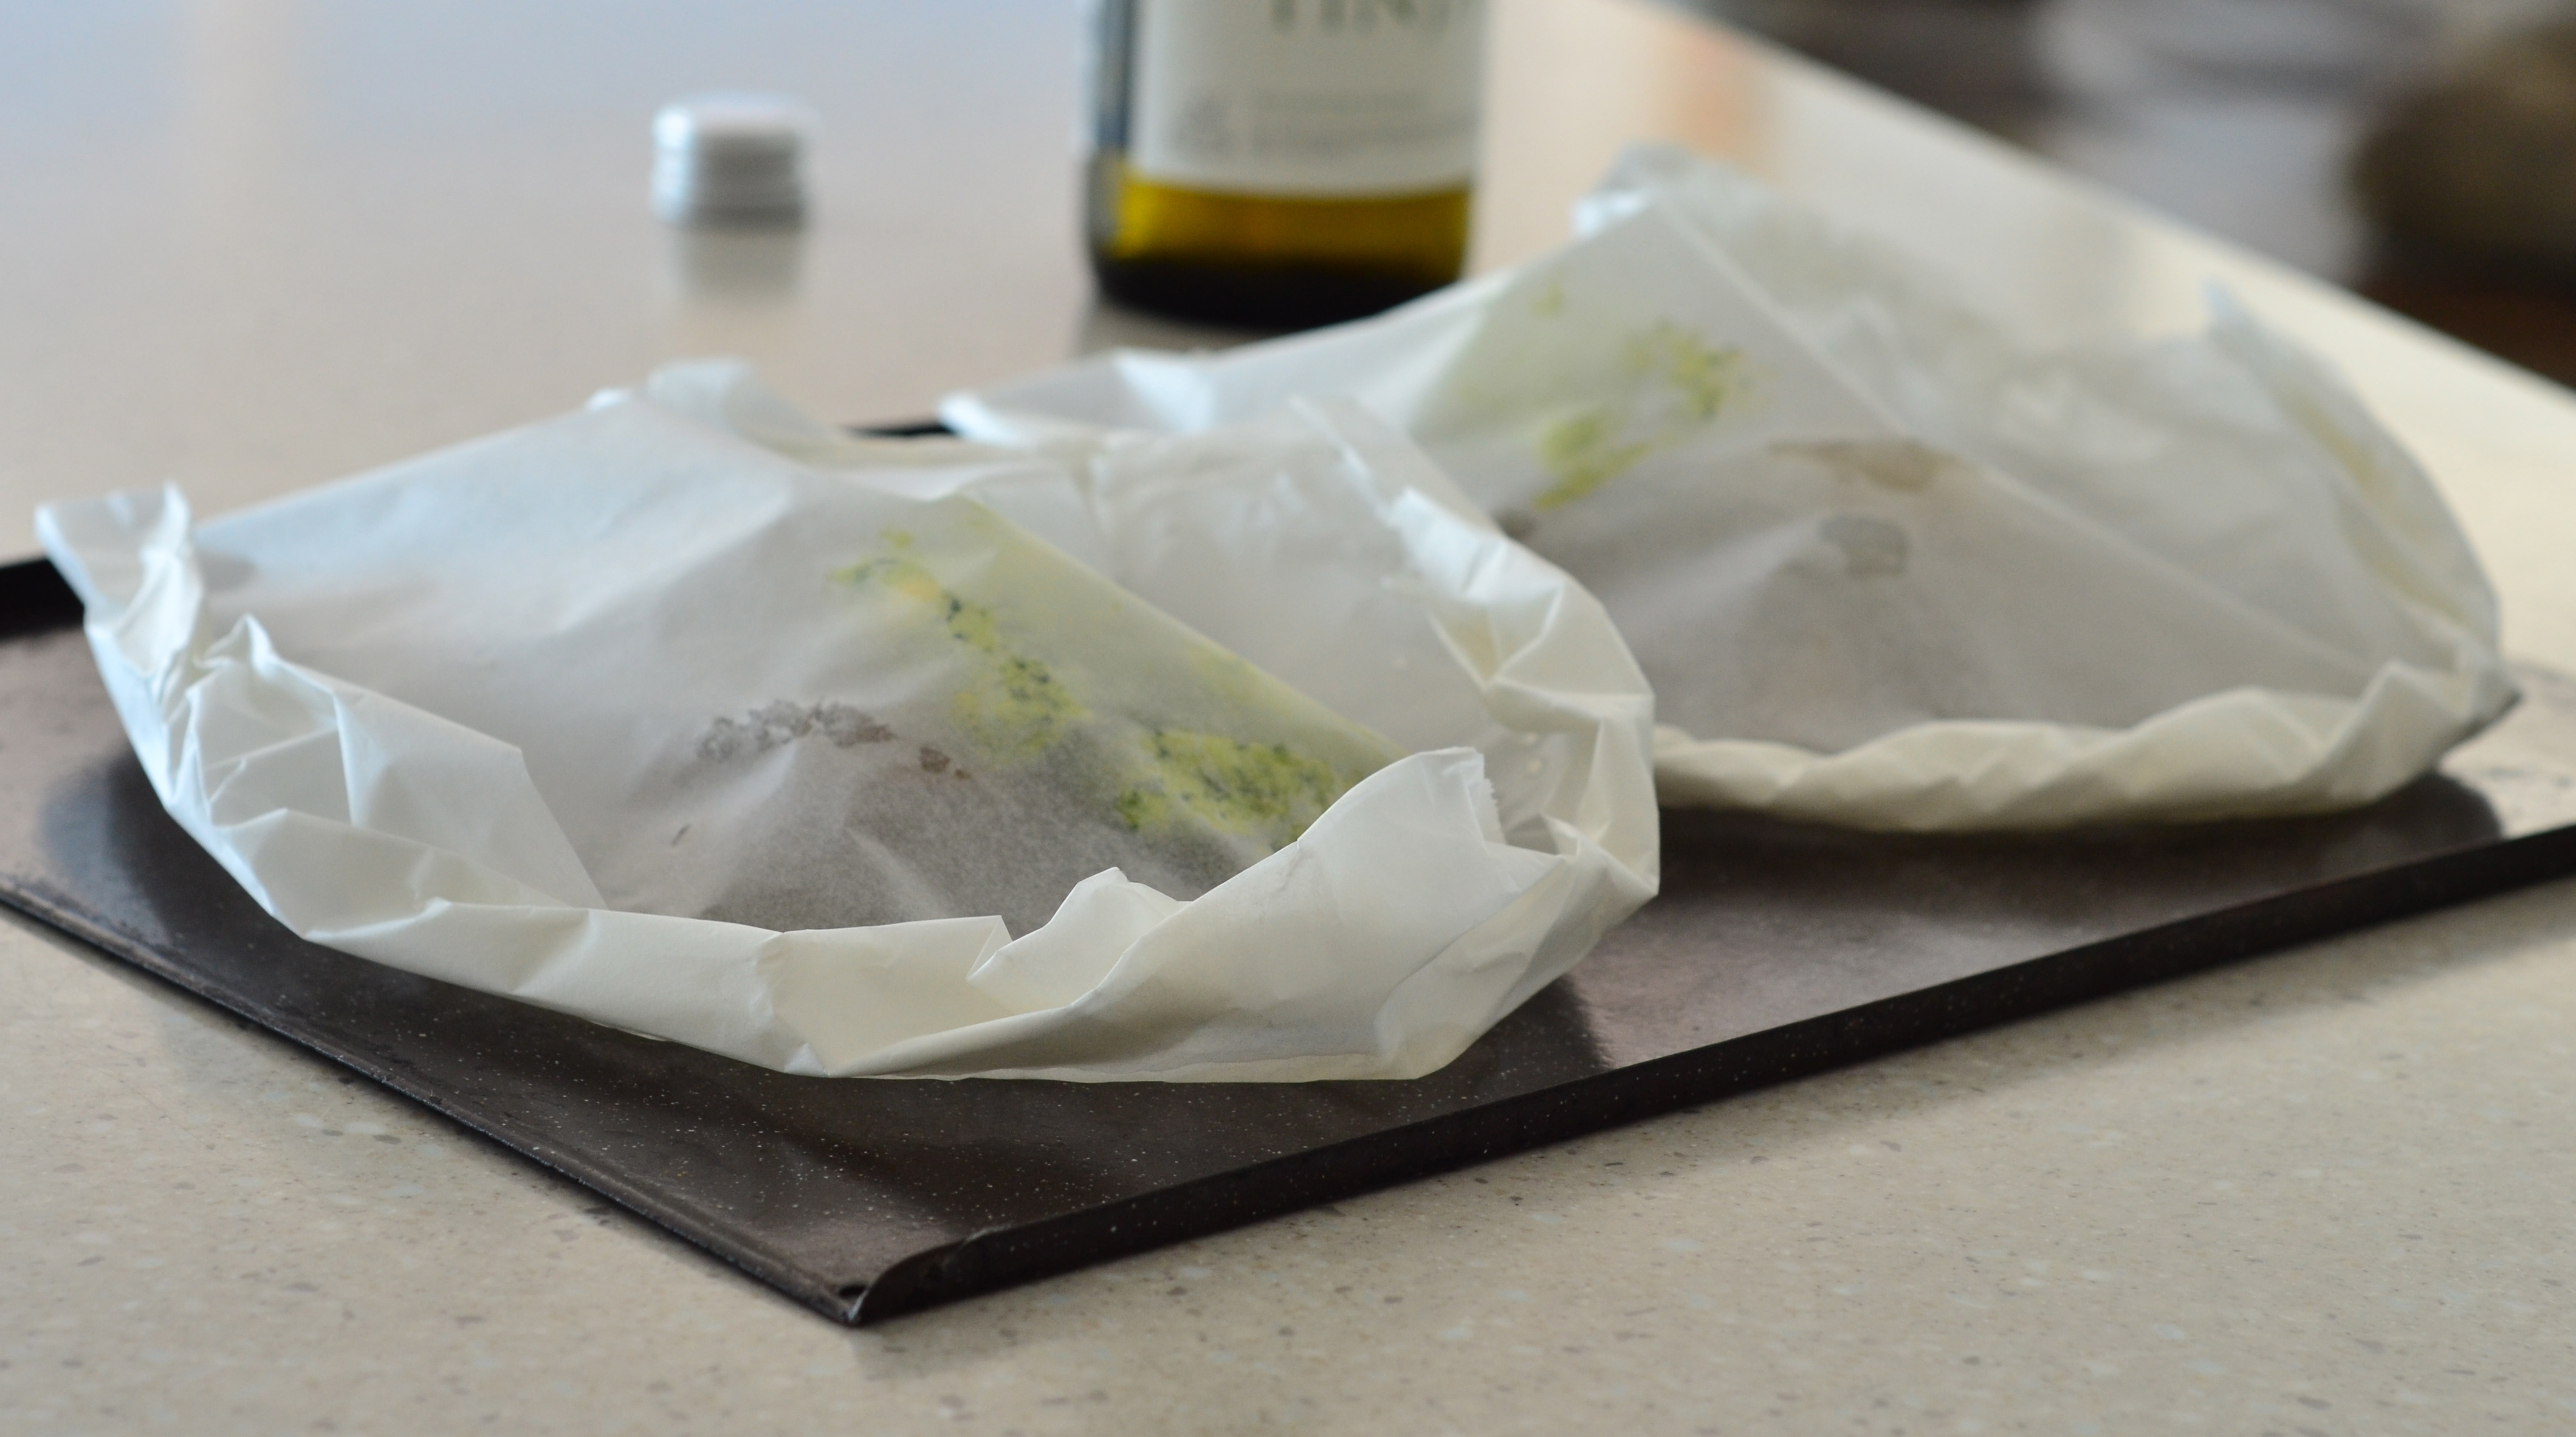
Now fold the baking paper over the prawns using the halfway line that you made as a guide and then starting from one end, seal the baking paper all the way around so that you have a parcel.

At this point, the parcels can be stored in the fridge until that are needed.

When you are ready to cook the prawns, unseal the parcels enough to be able to add about 2 tablespoons of white wine to each one. (Don’t try and do this ahead of time as the wine will leak out. I know. I tried and failed.) Reseal the bags really well, as the wine inside the bags will steam and cook the prawns. If there are any gaps, then the steam will escape.

Place the parcels on a baking tray and bake for 15 minutes at 180C.

Serve the prawns immediately in their little bags with fresh bread and a green salad. A very easy garlic prawn entrée.

You want to know what to do with the prawns heads and shells? Thai red curry with prawn stock and salmon.

Salmon tacos with cabbage slaw

At the start of the year, buzzing with good intentions and goals for 2015, I set up several reminders on my phone. Eat breakfast. Yes, I need a cue for this extremely important daily task, to nag me, otherwise the window closes and I’m left hungry. Cod liver oil. To prompt me to take this age old supplement that I wholeheartedly believe in. Salmon. A memo to encourage me to eat oily fish more often. Most of the time these words that flash across the screen of my phone are hastily dismissed. Yet a subliminal message must trickle through to my consciousness, because today I had the urge to make salmon tacos with cabbage slaw.

salmon tacos with cabbage slaw

Fish tacos are the best. Light. Fresh. Tasty. Colourful. Zingy. Zesty. Crunchy. Soft. Fun. This list of adjectives alone makes me want to prepare and scoff some right now. Plus they make great informal finger food and create a little bit of theatre when they are presented on a long plank, all neatly standing in a row, strands of pink cabbage and leafy coriander rustically on show, protruding from the sides.

salmon tacos with cabbage slaw

salmon tacos with cabbage slaw salmon tacos with cabbage slaw salmon tacos with cabbage slawsalmon tacos with cabbage slawsalmon tacos with cabbage slaw

Salmon tacos with cabbage slaw

For two.

For the salmon

  • 2 fillets of salmon
  • 2 tsp smoked paprika
  • 1 tsp chilli powder
  • 1 tsp garlic powder
  • sea salt
  • black pepper

Mix the spices on a plate and then coat the salmon in them by pressing the fish onto the plate.

Cook the salmon on all sides in a fairly hot pan or on the barbecue, only turning when each side has a lovely crust.

For the cabbage slaw

  • red cabbage
  • juice of a lime
  • pinch of sea salt

Slice the cabbage as finely as you can, pour over the lime juice and add the pinch of salt then massage the slaw with you hands. This step will soften the cabbage slightly and make it juicy and flavoursome. Add some chopped avocado to the mix if you wish.

To serve

  • warm soft flour tortillas
  • mayonaise
  • coriander, washed and coarsely chopped
  • lime wedges

To assemble

Take a warm tortilla and spread a dessert spoon of mayonnaise across the middle section. Flake some salmon and place it on top of the mayo. Top the fish with some slaw, a few sprigs of coriander, a squeeze of lime. Now simply roll up and enjoy.

Enjoy this recipe? Then you might like this quick Cajun salmon recipe

Overcooked quinoa 2 ways.

overcooked quinoa

I’m not quite sure what I was thinking, but I added double the recommended amount of water to cook some quinoa the other day. Having spied some preserved lemons at the back of the fridge, I was intending to make a Morroccan inspired salad to go with some lamb cutlets. Then besides dinner, I got stuck in to other household chores, rushing to get them done before Thea woke up and totally forgot about the simmering pot on the stove. After a sharp intake of breath when I remembered the intended base for the salad, which now resembled a mass of tiny, sludgy, beige pearls, I composed myself and set about thinking what the hell was I going to do with a mound of overcooked quinoa.

overcooked quinoa

I’m not one to waste food, which drives Mark crazy. He despairs with all the little parcels of leftovers in the fridge, but I always find a use for them. Stale sourdough bread is consistently made into crumbs for schnitzels, the ends of cheese are grated to go into a smelting pot in the freezer for pizza, cheese sauce and the occasional toasted sandwich and leftover gravy is added to béchamel sauce for robust green leafed  vegetable gratins that I love to serve with roast pork.  Faced with the watery, stodgy, flavourless mound of pseudo grains, I thought about what they resembled and in turn might be converted into. The mushy quinoa seemed like it would work well in place of mashed potato to make salmon cakes. And the fishcakes could be spiked with preserved lemon, capers, dil and parsley, punchy ingredients that would transform the bland pile into something edible once again. Some crisp green leaves would form a complete evening meal and once again dinner was back on track.

overcooked quinoa

But wait. That’s not all. After making six large salmon fishcakes, I still had oodles of overcooked quinoa left. I started to wonder if I’d added four times the amount of water I was supposed to! That or I’d had a brain freeze and cooked enough for a large catering order. Either way, another recipe was needed to make use of what still remained. With the tiny person still asleep, I embarked upon another dish. This time a recipe from the Petite kitchen cookbook for Cheddar and quinoa muffins with sun dried tomatoes and basil. Single serve snacks that could be put in the freezer for when a tummy rumble struck. They’re very simple and quick to make and baked in little paper cases, an entirely portable snack.

overcooked quinoa

After all the huffing and puffing and scolding of myself for not having set a timer for the quinoa, I was now able to survey my kitchen bench burdened with dinner, possible lunches and enough snacks for the foreseeable future. Hindsight usually reveals mistakes to be entirely perfect in their outcome.

overcooked quinoa

 Salmon fishcakes – a recipe using overcooked quinoa.

4 cups (over)cooked quinoa
2 fillets of cooked salmon, flaked
A handful of chopped parsley
A handful of chopped dill
1-2 tbs chopped capers
1 preserved lemon, rind finely chopped
Sea salt and black pepper
2 eggs

Mix all ingredients together in a large bowl and then shape into tennis ball size fish cakes.

I will confess that I tried to pan fry one of the salmon cakes, imagining that it would go crisp and chewy. This was not the case as the patties were too wet from, ahem, the overcooked quinoa. Baking resulted in a much better result.

Bake for 30-40 minutes at 180C.

Enjoy with a crisp green leaf salad.

Cheddar and quinoa muffins with sun dried tomatoes and basil.

From My Petite Kitchen Cookbook by Eleanor Ozich

540g cooked quinoa
4 eggs
100g Cheddar cheese, grated
2 large handfuls basil, chopped
40g sun dried tomatoes, chopped
Sea salt and black pepper

Mix all ingredients in a large bowl and then divide among the holes of paper lined muffin tin.

Makes approximately 6 large and 12 mini muffins.

Bake at 180C for about 25 minutes.

My top pavlova making tips.

DSC_0240

DSC_0245

Today was a perfect day. It began with sipping my morning coffee while browsing though the Sunday paper, the whole time wresteling with Thea for a portion of my Birthday almond croissant. Of course she won, stuffing fistfuls of the nutty, flaky pastry into her mouth with complete abandon and glee.

DSC_0242

The breakfast battle over, I donned my kitchen apron and ran through my prep list for lunch. Moreton bay bugs with garlic and parsley butter, mango and coriander marinated prawns, chargrilled squid and cannellini bean salad, homemade sourdough crumbs and herb topped mussels and buffalo mozzarella and tomato salad. Oh and a huge, billowy, two tiered pavlova, with more cream than necessary and fresh summer berries.

DSC_0228

DSC_0250

Being a celebratory day, Pimm’s was the aperitif of choice, which after quaffing, we all sat down to eat. Since we were all family, there was no ceremonious behaviour around the table and platters of seafood were passed up and down, back and forth, as everyone dug in and filled their plates. Even Thea, seated at at the head of the table in her high chair, sat still for a portion of the meal, munching on this and that, sometimes sneakily feeding what she didn’t like to the dog. (It always makes me chuckle how much she delights in doing this, as I’m sure must he!)

DSC_0249 DSC_0252 DSC_0253 DSC_0261 DSC_0288 DSC_0282

The main course finished, it was time for dessert. A Cinderella skirt size pavlova, decked out in whipped cream, strawberries, raspberries, blueberries and blackberries was served. It was wonderful to actually sit down and be able to savour one of my own meringues. I have cooked so many this summer, and thankfully, the practice has paid off. It was delicious. And devoured. No one complained about the larger than average portion sizes of crunchy, creamy, light, soft, sweet and chewy final course and yes please to seconds. A truly perfect way to finish a long birthday lunch.

DSC_0295

DSC_0307 DSC_0325

Pavlova

The following is enough to make a beautiful two tiered pavlova. Adjust accordingly.

  • 8 egg whites (320ml)
  • 450g caster sugar
  • 2 tsp white vinegar
  • 4 tsp cornflour

Pre heat the oven to 200C.

Start by separating eight eggs. It’s a really good idea to measure the egg whites out exactly. One egg white is approximately 40ml. When you have separated the amount needed, pour into the bowl of a free standing mixer and begin to whisk with a whisk attachment. Start with a slow speed for a few minutes and then increase to high.

Whisk the whites until they are stiff, in that they will hold a soft peak, then begin to add the sugar, little by little.

When all the sugar is incorporated, stop the mixer. The mixture should be beautifully glossy. Add the vinegar and sift in the cornflour and gently fold in with 10 slow turns of the whisk.

Now, with haste, pile the mixture within the circle, or circles, that you have drawn on greaseproof paper lining a baking tray, or trays. Put the tray(s) into the preheated oven and immediately turn down the oven to 100C.

Cook for about 1 hour and then turn the oven off, prop the oven door ajar and leave the pavlova to cool.

Pavlova making top tips

*Do make sure that the bowl and whisk that you will be whisking the egg whites with are free from grease
*Do make sure your eggs are fresh and at room temperature. If you do get any yolk in your whites as you are separating them, use half and empty egg shell to retrieve it. The shell attracts the yolk. Clever! Same goes for any bits of shell.
*Start by whisking the whites slowly, then increase the speed
*When the whites are stiff, slowly add the sugar in increments over 10 minutes, whisking constantly
*In between whisking in the sugar, line a tray with baking paper and trace a circle (or several circles) on it so you know where to pile the meringue mix
*When you have added all the sugar, stop whisking, add the vinegar and corn flour and then whisk in slowly with about 10 turns of the whisk. As soon as you have done this, speed is of the essence.
*Pile the meringue onto the prepared baking sheet and pop into an oven preheated to 200 degrees. As soon as you close the door, turn the temperature down to 100 degrees. Cook for about one hour until the outside is firm.
*Leave the pavlova to cool in the oven (overnight) by turning the oven off and propping the door ajar with an oven mitt or something similar
*Enjoy. With whatever fruit is in season and more cream then necessary.